|
|
||
|
|
Select Aquatics of Erie, CO |
|
|
|
Breeding the Puntius padamya "Odessa" Page 3 - Breeding Specifics - Actually Doing It
|
|
|
|
|
|
|
Page 1: Odessa Barbs, Origins of the Odessa Barb Page 2: Overview of Breeding the Puntius padamya * Page 3: Step by Step Specifics of How We Breed Them Here Page 4: An Easier (But less Yield) Way to Breed Them
|
|
|
|
Preparation of the Water the Fish Will Breed In: Earlier mainstream hobbyists books - including most that claim to best help to learn how to breed these types of fish say that if the parents are ready to breed, and you set up the tank such that the fertilized eggs are kept from being eaten by the parents, that there is nothing else you can do to assure the success of your batch until the fish hatch. This is not only incorrect, but failing to prepare the water beforehand, in my experience, guarantees that you will produce a very small yield from your effort. In fact, without careful preparation of the water to have generous amounts of infusoria provided at hatching, relatively few fry will survive. Though I mention 250 - 300 viable fry will reach to one month with the ratio of males to females mentioned above, in fact, the most recent batch was over 1400 fry. With each spawning I have become better at it, and generally 250-300 was more than enough to meet my needs. But with careful monitoring and care of the new fry during the first month, yields can be much larger. |
|
|
|
|
|
|
|
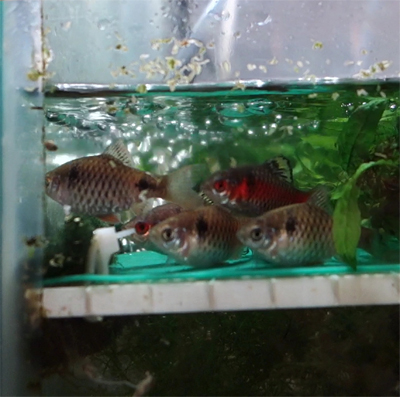
A
breeding group, these females are full of eggs.
Be sure you have the room to raise out the fish after they hatch- |
|
|
|
|
|
|
Yield:
Usng the same number of breeders (4-5 pair), I started off producing 200-250 that made it to one month old. Eventually I went to doing a breeding cycle every 6 weeks, improving my ability and getting to consistently producing about 300 at a time. The result was that within 6 months I was knee deep in Odessas that were not being raised out to their maximum size, because I did not yet have the space and resources to raise that many fish consistently at that time. Today I breed less frequently - 2-3x per year, and produce 500 - 700 each time. This last batch ended up being 1400, so it may be 6 months before I breed again. |
|
|
|
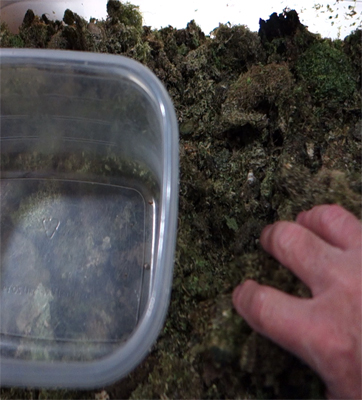
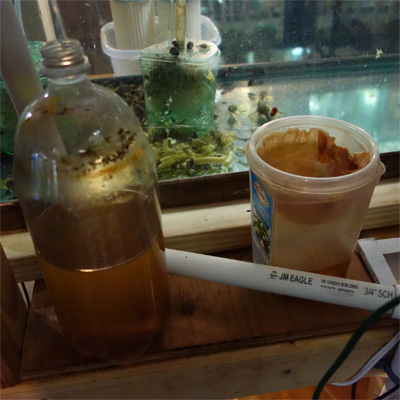
Prepare the infusoria Starter I used many of the standard means of creating infusoria (Hay, lettuce, etc.) at first, until another breeder friend pointed out that infusoria can be easily created that is unique to your fishroom - everything came from your tanks, and the mix will be best matched to your water qualities, etc. To do this, I save any duckweed that is removed from my tanks, where it is put into a plastic tub, where it dries out. Through crushing it with your hands, it can be turned into a rough powder. This becomes the infusoria starter to prepare infusoria for the new fry. I have dried duckweed here now that is years old, the bacteria will always come back as soon as the material is put back into the water. |
|
|
|
|
|
|
|
|
|
|
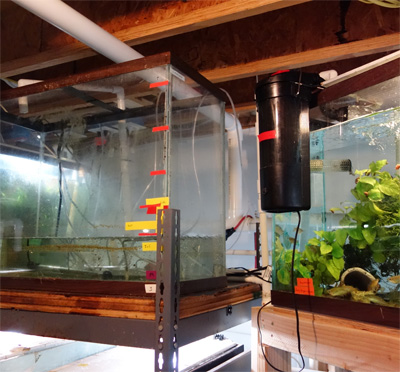
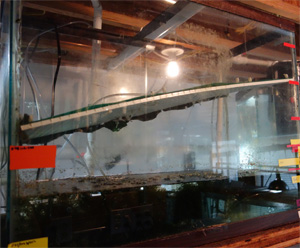
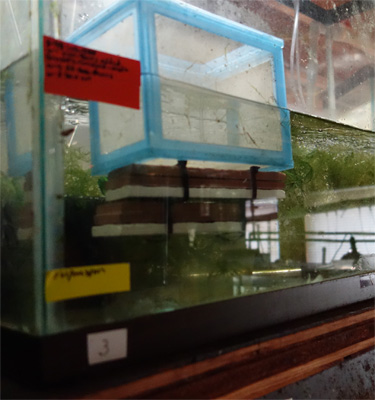
| 29 gal. Odessa breeding tank on left, 55 gallon water change resource on right. |
|
|
|
The pic on the left shows the tub of
dried duckweed and other crushed up fine leaved plants, used to generate
infusoria in the breeding tank before the adults are introduced to spawn. the pic at right shows a larger, established tank used for the 3x per day 50% water changes the growing Odessa fry require. In this case the bigger tank is a 55 gallon pleco breeding tank. The approximately 5 gallon water changes happening throughout the day often triggers the plecos in that tank to spawn. The water is drained from the Odessa tank, then a siphon from the pleco tank brings back up the water level. The pleco tank is then replenished with water from the tap, and the original water from the Odessa tank is put into the daphnia tubs outside. |
|
|
|
|
|
|
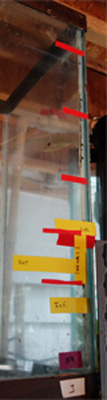
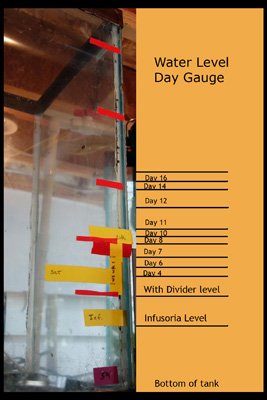
Starting the Breeding Process: A barebottom 29 gallon tall tank is used for breeding - and this size tank is actually not ideal, a 30 breeder is possibly better, but I simply had gotten used to using this, and though I have bred the Odessas in 40 breeders,the recent large batch - done in the 29 tall- has shown that with proper maintenance, going to a larger tank isn't necessary. For me as well, I like being able to see into where the the fry are to check on them as they grow. The 29 set at eye level is a good size for that. On an open corner of the tank I have marked with tape at the 4 inch point, marked "INF" for infusoria, then, at 5.5 inches tank depth, a second piece of tape is marked "DIV"- This is the level at where the divider will be placed. At 6 inches, the next piece of tape marks the "SET" point, where the water level stays once the divider is removed, and you are watching for signs of when the water level can begin to be raised. At 7 inches, the next piece of tape marks where the fish should be by about week 1 - no higher. The week 2 piece of tape is at about 8 inches. 3 weeks is at about 10 inches. 4 weeks takes you to within about 1.5 inches of the top of the tank. This can be seen below- Raising up the new fry in water deeper than just a couple inches causes airbladder problems, and can affect nearly half the batch - where the fish must fight to raise up from the bottom. By moving them to a tank of just a few inches deep, many can recover when this happens, but many will be lost. the next pieces of tape are markers for week 2 and week 3, based on the rate that previous batches were ready for at that time. The basic rule is to keep the water level low if water quality can be maintained. Experencing the full depth of the aquarium will generally not occur until slightly after the 1 month old mark. |
|
|
|
|
|
|
This tells me where the water
level should be when:
The infusoria is started,
a 50% water change is done
The divider is added,
The adults are added,
When the adults are removed,
after the divider is removed,
and then at 1 wk, 2 wks, etc.
|
This is a
breakdown of |
|
|
|
|
|
|
Prepping the Breeders Your males and females should be separated, and if mature there should be females that are full of eggs. Once males are fully colored up, and females are become ripe with eggs, they are ready to breed, likely at 8-10 months. Females generally take about 10 - 14 days, minimum, to fill with eggs after spawning. In preparation for choosing the best females to improve the line, it helps to bring out the color in each female before the selection is made, as the quality of color in the females, particularly with respect to which females will produce the best males, will be unknown. A practice used for many years by guppy breeders comes into play. At about the same time as you are adding the dried duckweed to the breeder tank, start feeding the females a color food. No hormones or artificial means, but any of the all natural color enhancing foods will do a good job. Over time you will find brands that you are happiest with. If you wish to contact selectaquatics@gmail.com, I will tell you which types are used here. Keep the feeding going until the actual selection of female breeders occurs. The males should breed readily when well fed, and feeling good - evidenced by good color. They only need 3--5 days to recover from breeding.
|
|
|
|
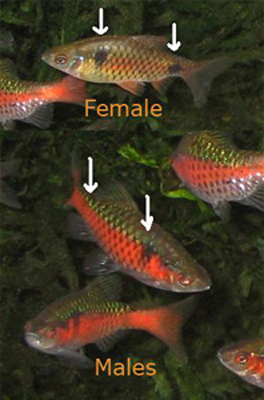
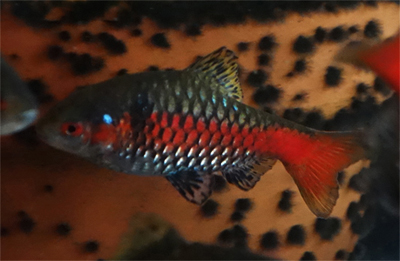
Easy to sex once the males
color up, the young are
nearly identical to one
another. The female has
no red stripe, and holds
on to the second black
dot near the tail. One
means of sexing them
early is that the young
males may show faint black
markings in the dorsal fin,
and the females do not.
|
|
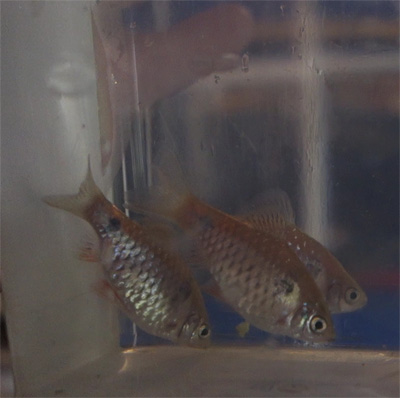
A group of adult females that are very
full of eggs and ready
to breed. It is ideal if they can be bred when they get
this
full of eggs, but living in this state does not seem to
harm
them. Though they might disagree with you!
|
|
|
|
|
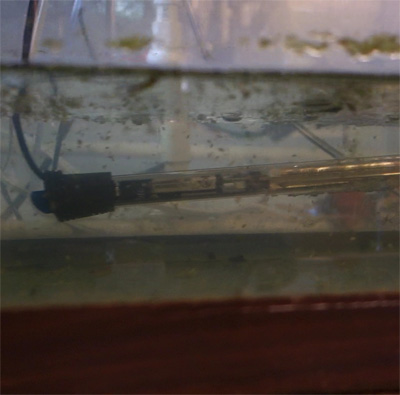
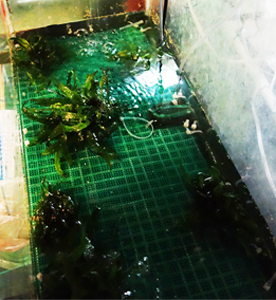
Preparing the tank: Fill a cleaned, 29 gallon tall tank with about 2 inches of good quality, aged aquarium water and 3 moderately strong airstones placed at each end and middle of the tank. Light is provided 24/7. Temperature of 78 degrees. My water here is moderately soft, at about 90ppm. In this initial setting up, I have also used fresh tap water - and will let the tank run with airstones for a day - "degassing" any chlorination before proceeding to the next step. This is probably the best way, but it also adds a day to the process. Infusoria takes approximately 7 days to "Bloom", where the newly hatched infusoria are released from the dried duckweed. Odessa eggs hatch within 1-3 days of being laid. So to have the infusoria blooming at the time of maximum hatching, the dried duckweed will need to be added at 5 days before the parents are introduced to the tank. I generally add 2-3 tablespoons of the dried duckweed to the churning water in the aquarium. At day 4, Java moss carefully cleaned for this process is spread evenly and not too thickly along the bottom of the aquarium. An equal amount of more java moss, or even better, java fern, is cleaned and prepared to add on Day 5. You want to be sure there are no shrimp, organisms that will eat eegs, and as few snails as possible where the eggs will be laid. On Day 5, bring the water level up to the spot where the divider piece of tape designates, adding clean, aged water from another established aquarium. You may want to do more than one water change to get the water to a clarity that will be healthy and easy to work with, if a lot, or too much of the dried duckweed was used. Place in the divider, carefully made so that the smallest adults cannot get below it. A loose adult below the divider not only means that many of the new eggs and fry will be eaten, but to fix the problem the fish will need to be taken out and everything removed, fixed, and put back together. Do not feel bad if this happens - I made many divider designs to get one that worked! Above the divider, now place small clumps of java fern throughout, so that fish can swim through the tank easily, but many hiding places are provided. The water level should be just above 1/2 inch- the backs of the adult fish as they swim above the divider. Turn up the airstones below the divider to keep a mild current and healthy oxygenation going on below the divider. |
|
|
|
|
|
|
|
|
a hole cut in the bottom of a container sitting over a larger container.
|
|
The second day after the dried duckweed was added. By day 5 when adults are added water will have cleared up. |
|
|
|
|
|
|
|
|
|
The
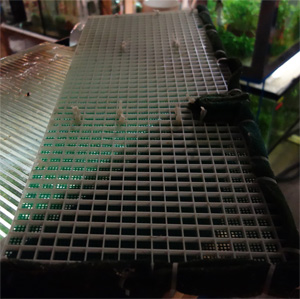
Divider: plastic honeycomb light diffuser |
This is how the divider sits in the tank when the
breeding occurs. Notice the amount of Java fern
used. the round electrical tie loop is so that the
divider can be lifted out easily with a net handle.
The divider is being
carefully
lowered in.
|
|
|
|
|
Selecting Breeders: |
|
|
|
|
|
|
|
|
These females are a little washed out from being spooked,
but their color is actually good,
particularly the female on the
left, and all are full of eggs.
|
|
|
|
|
On the
morning of Day 6, day 2 of adults being put together, they will start to
settle down, with some chasing by the males, |
|
|
|
|
|
|
On day 7 I watch the breeding activity (#rd Day of adults together). If it is still going gangbusters, and females are still robust and full of eggs, I will let them go another 1-2 days. Sometimes, if I can do it easily, I will pull any slimmed down females at this point, leaving any still to drop their eggs. Generally i will let them go one more day. If all females are slimmed down, pull them. Do two feedings of dry food, in the morning and late afternoon, followed by a vinegar eel feeding of one 2 liter harvest, both followed by 50% water changes. |
|
|
|
|
|
|
On
day 8, If breeding continues I will leave them in for up to 5
days, but generally pull the adults mid afternoon of the third
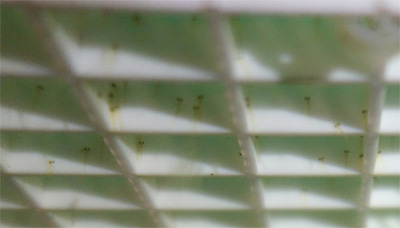
day of being together. Again, a small feeding of dry food for the adults first thing in the morning, followed by a vinegar eel feeding and a 50% water change. The adults are removed late afternoon, and vinegar eels are fed again after they are removed, followed by a 50% water change. DO NOT REMOVE THE DIVIDER or the Java fern clumps. They will be left in for 3 more days as the eggs are mildly adhesive. The water level can also be lowered slightly once the adults are removed, be sure to keep the water level so that it covers the divider. I will also tilt the divider so that it is no longer firm against the aquarium glass, and is laying in the water such that the new fry below can get to the surface. All movements are slow and gently so as not to harm any new fry or eggs. Once eggs are laid, to siphon water from the aquarium to do water changes, you will need a net breeder. When it is time again for a water change, fill the tank to the level marked that indicates the water level had been increased by 50%, then carefully, gently, place a fine mesh net breeder on top of the divider, at a corner, or a place (near an airstone?), if possible, where the new fry will be less likely to congregate. Then carefully siphon the added 50% out from inside of the breeder so that new fry will not be siphoned out. It will still happen as the fry are very small, and at times I have saved the water change water - with an airstone put into the 5 gallon buckets that the water was drained into, and then with a flashlight would remove any fry that had been siphoned out. At this point - 1-2 days before the divider is removed, you may start to see new fry hanging on the sides of any smooth surface. Once they absorb their egg sac (1 day), they will start feeding on the microorganisms that grow on the fronds of the java moss, generated from the infusoria starter,and will be eating the vinegar eels within 1-2 days. Once they begin seeking out food on their own, you will no longer see them - they will stay hidden in the Java Moss, but they will rise up out of the Java Moss when the vinegar eels are added to the tank. It is entirely possible after 5-6 days of growth to stare into the tank with a flashlight, looking carefully for any fry to see just a couple swimming between the java moss. Don't be concerned - in the most recent hatching, reflected in these pics, there were nearly 1500 fry in the tank, but few could be seen at this stage. |
|
|
|
|
|
|
|
The breeding tank with divider
still in, net breeder to on out water without siphoning out the new fry. |
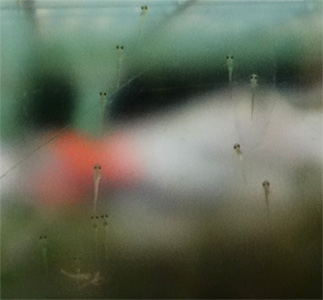
| The new fry at just hours old. |
|
|
|
|
|
|
can only handle going about 12 hours without being fed.
The routine I recommend - 3x feedings per day, followed
by a 50% percent water change a half hour or so later,
is both the minimum and the maximum amount of feeding
they require. If a single feeding is missed, you will lose a
substantial portion of them, and at the same time,
particularly during the first 3 weeks, a close eye must
be kept if ever a bacterial bloom should develop as the
food overwhelms the tank's ability to process it. An
extra 50% water change is often necessary when a quick
glance shows a slight cloudiness beginning in the tank.
During the first 2 weeks you may need to do an extra
water change 3 or 4 times. You cannot go in and siphon
off any mulm or detritus from the bottom, as you will
remove fry.
|
|
|
|
|
|
|
At this point it becomes a delicate balance between food going
in, and maintenance of water quality through water changes. The least sign of bacterial cloudiness must be followed immediately by a 50% water change, and you may have a number of days where where more than one water change after a feeding will be needed. Learning how much to feed and spotting trouble as soon as it presents itself is where the skill lies. The water must stay perfectly clear - there will be debris from the dried duckweed still present, but at this point it will not cloud the water. Do not try to remove or "clean" the tank in any way. There is no filtration yet, only water changes. Any well-intentioned disruption in the tank will damage the new fry. You will want to try prepared powdered dry foods - generally egg yolk based- because it seems that would be a good idea. I have tried a number of preparations, and though it does what it is supposed to do, I found the delicate water quality balance to be especially difficult to control - it is very easy to overfeed cooked, powdered egg yolk. And after so many times of breeding and raising these fry, I do not know that any benefit provided exceeds what they are already getting with vinegar eels and BBS. |
|
|
|
On
the third day after the adults are removed, carefully, slowly
remove the java fern clumps and then the divider. You will probably need to turn down the airstones slightly so that the water is heavily oxygenated, and some mild current is going on, but you want to be sure that there are broad areas in the where the new fry can sit peacefully - you do not want to see the constant "churning" of the water that occured when the dried duckweed was first added. At about day 6 after the adults were removed, you will want to add BBS to the vinegar eels fed to put quick size on to the larger fry. Vinegar eels are surprisingly nutritious, they do an excellent job getting them to the size to get on to Baby Brine Shrimp. Once they are on Brine Shrimp their growth really takes off. I feed Brine shrimp two ways. before a breeding cycle begins I will prepare about 10 trays of frozen, newly hatched BBS, and have raised up batches on this alone. However, the fish are more enthusiastic with live BBS whenever possible. But they will eat to full gluttony on either. Essentially, I feed newly hatched whenever possible, but will alternate frozen (or feed frozen entirely) depending on the time I have to devote. The frozen BBS may cloud the water more quickly, though live will do the same within a day. With the heavy water changes, and your watching the tank closely, this should not be an issue. |
|
|
|
I have found, and this is entirely anecdotal, entirely from my
personal experience, that many fertilized eggs will continue |
|
|
|
|
|
|
|
|
|
|
At left a glass 6 inch Pyrex bowl is
sitting on the bottom, and two groups of tiles are supporting the net breeder as the water level increases. It is best to remove the breeder after each water change, as the fry will work their way into it and get siphonned out. Yeah, it's a little clumsy, but it works well. |
|
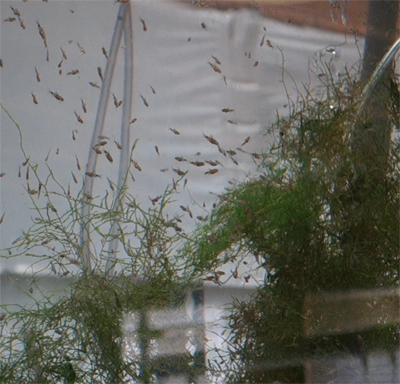
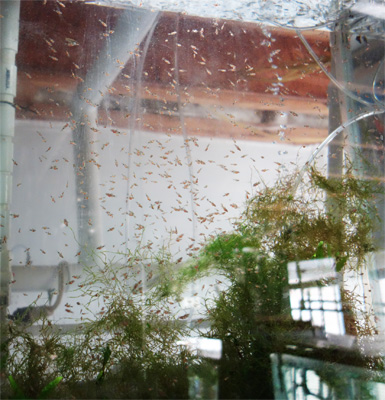
This is that 29 gallon on Day 30. The fish
are just big enough to move with a net. With over 1000 fry in that tank. moving them as soon as possible to give them room to grow out is essential. This amount of fish will quickly overwhelm a tank that size. They have stayed on 3x daily feedings and 50% water changes 1/2 hour after each feeding. |
|
|
|
|
|
|
Do not be discouraged when a batch is lost, I
have lost many thousands of fish since first doing this, and in
the wild most would perish or be eaten anyway. Only two fry need to survive over the course of the fish's lifetime to maintain the species, and they will breed up to a couple times a month- and they have fairly long lives. Eventually you will get your technique dialed in! If you have any questions or comments, email me at selectaquatics@gmail.com!
|
|
|
|
|